
custom mailer box template
Showing the single result
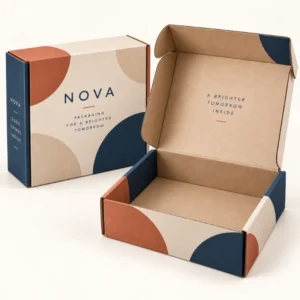
A custom mailer box template is the flat layout, often called a dieline, that shows every panel, fold and cut line of a mailer box before it is printed and formed. Working to the correct template is what keeps logos off creases and text away from edges, and Custom Postal Boxes, a project of Vertex Packaging based in Wolverhampton, supports UK businesses with free design help on the custom printed boxes it manufactures in house.
What a custom mailer box template shows
The template lays the finished box out flat. Cut lines mark where the board will be trimmed, fold lines mark where it will crease, and each panel is labelled by its position once assembled, such as lid, base, front wall and dust flaps. Artwork is placed panel by panel on this layout, which is why a design that looks right on a screen rectangle can still fail on a real box if the template is ignored.
Three zones matter on every template. The bleed area is where background colour must extend past the cut line so no white edge appears after trimming. The safe area sits inside each panel, and logos, text and other important elements should stay within it. The fold lines need breathing room too, because artwork crossing a crease can crack or read awkwardly once the box is built.
Setting up your artwork file
Build artwork in CMYK colour mode rather than screen based RGB, because print inks reproduce colour differently and late conversion can dull bright shades. Place photographs and raster images at 300 dots per inch at the size they will print, and supply logos as vector files where you can, so edges stay sharp at any box size. Keep the template on its own locked layer above your artwork, and never move, rotate or resize it.
Checking a proof before printing
Fold a printed paper mock up of the template at home or ask for a digital proof, then check which way each panel faces when the box is closed. Text on side walls is often upside down in first drafts, and the inside lid is the panel most people forget to design. Approve the proof only when orientation, spelling and colours are all correct.
Common template mistakes and how to avoid them
The most frequent errors are artwork built to the wrong box size, designs centred on the flat layout instead of on individual panels, and important details placed over the glue flap, which is hidden once assembled. Another is forgetting the shipping label area on the lid, where a busy pattern can reduce label adhesion and compete with the address. Plan one calm panel for the label and any postal markings.
Interior print needs the same care. A message inside the lid is a popular choice for custom mailer boxes in the UK, but it must be rotated so it reads correctly when the customer opens the box, not when the sheet lies flat. If you plan inserts, look at custom mailer boxes with inserts and leave their footprint out of your panel designs so nothing clashes when the box is packed.
When to ask for design support instead
If you have a logo and brand colours but no artwork software, you do not need to master templates yourself. Free design support means the Custom Postal Boxes team can place your elements on the correct template, check bleed and safe areas, and send a proof for approval. That route suits first packaging projects and rebrands where several box sizes must match.
From template to finished boxes
Once artwork is approved, the template size is fixed, so changing box dimensions later means new artwork as well as new tooling. Measure your product with any tissue, inserts or protective wrapping included, and add modest clearance so the lid closes without bulging. Ordering a single sample size first is a sensible check before a full run across several sizes.
Custom Postal Boxes manufactures printed mailer, postal and shipping boxes in house, with low minimum order quantities and free UK delivery, and ordering is quote based because pricing depends on size, material and quantity. Send your product measurements and artwork, or just your logo files, through our contact page for a quote and mention that you need template help. The printed postal boxes range shows other formats the same process covers.
FAQs about custom mailer box template
What is a dieline on a mailer box template?
A dieline is the flat outline of the box showing cut lines, fold lines and every panel in its correct position. Artwork is arranged on the dieline so that each design element lands on the right panel when the box is cut, folded and assembled.
How much bleed should my artwork have?
Extend background colours and images past the cut line to the bleed line shown on your template, commonly a few millimetres on each edge. The design support team will confirm the exact bleed for your box size before you finalise artwork.
Can I design a mailer box without specialist software?
Yes. Supply your logo, images and brand colours and the free design support team will build the artwork on the correct template and send a proof. You only need to check orientation, spelling and colours before approving it for print.
Why does my template artwork look upside down?
Flat layouts show panels in positions that rotate when folded, so some panels appear inverted on screen but read correctly on the assembled box. Folding a paper mock up or viewing a proof of the finished box is the reliable way to check orientation.